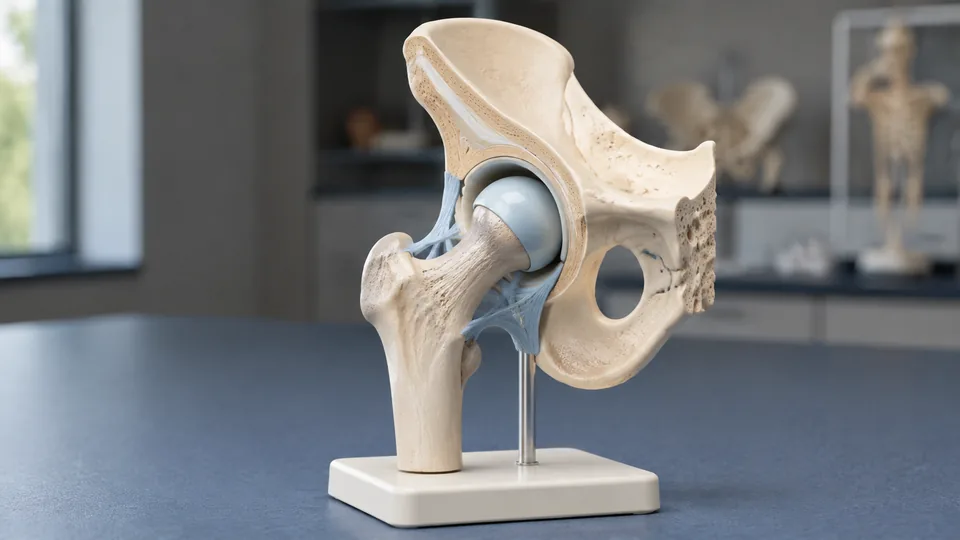
The hip looks straightforward in a textbook until the femoral head disappears into the acetabulum and several stabilizing structures overlap like layers of a tightly packed puzzle. That spatial complexity sends anatomy students, physical therapy instructors, artists, and clinicians searching for a model they can rotate, point at, and place beside a diagram. Products vary sharply, from focused life-size joints with flexible ligaments to compact multi-joint sets and detailed pelvic models that show the hip in a broader anatomical neighborhood.
A common buying mistake is picking a model by size alone. Scale matters, but removable muscles, visible ligament paths, movable components, color coding, and a stable base often determine how useful the model feels during a study session or patient conversation. A student memorizing muscle attachments has different priorities from an instructor demonstrating ball-and-socket movement across a classroom. Among these nine options, the Hip Joint Model With Removable Muscles offers the strongest balance of life-size proportions, detachable anatomy, and focused hip coverage.
For a quick route through the choices, the table below highlights the scale, anatomical emphasis, and most practical use for each model.
Quick Answer
Best overall: The Hip Joint Model With Removable Muscles is the most versatile focused hip model here, especially for studying muscular relationships and attachment markings. The Vision Scientific Classic Functional Hip Joint Model is a simpler value-oriented choice for joint mechanics, while the JNMFTD Female Pelvis and Lumbar Spine Model provides broader regional context for advanced teaching.
Best Hip Anatomy Models Comparison Table
| Product | Best For | Scale or Size | Key Anatomy |
|---|---|---|---|
| Hip Joint Model With Removable Muscles | Overall hip study | Life-size | Removable muscles and attachment markings |
| Vision Scientific Functional Hip Joint | Joint movement and value | Natural size | Flexible ligaments and ball-and-socket mechanics |
| JNMFTD Female Pelvis and Lumbar Spine Model | Regional anatomy | 1:1 life-size | Pelvis, lumbar spine, nerves, muscles, and femoral heads |
| Female Pelvic Muscle and Perineum Model | Pelvic floor education | Life-size | Pelvic floor, nerves, perineum, and movable coccyx |
| Six-Piece Human Joint Model Set | Whole-body joint comparison | Life-size | Six major joints with ligaments |
| GPI Mini-Muscled Joint Model Set | Compact muscular reference | Miniature | Four joints with muscles, nerves, ligaments, and tendons |
| EVOTECH SCIENTIFIC Mini Joint Set | Portable demonstrations | Half life-size | Four movable major joints |
| Merinden Mini Human Joint Set | Ligament visualization | 1:2 scale | Color-contrasted ligaments and capsules |
| Life-Size Joint Simulation Model | Basic movement demonstration | Natural size | Flexible ligaments and multi-directional movement |
The detailed reviews below show where each model fits, including the compromises hidden behind compact scales, broad anatomical coverage, and removable parts.
1. Best Overall: Hip Joint Model With Removable Muscles, Six-Part Life-Size

Muscle layers are where a flat hip illustration can turn into a blur of colored bands. This six-part model tackles that problem with removable muscles and marked origins and insertions on the femur and hip bone. Pulling away a muscular component reveals relationships that would otherwise remain tucked behind it, which can make an evening of anatomy review feel far less abstract.
The model is life-size, hand-painted, and made from easy-clean PVC according to the listing. Magnetic assembly adds practical appeal for repeated demonstrations because components can be separated and returned without a complicated fastening system. A base keeps the display organized, while the included color brochure gives beginners a starting reference when the markings first look like a riot of unfamiliar colors.
Pros
- Life-size format supports realistic spatial study.
- Removable muscles reveal deeper anatomical relationships.
- Muscle origins and insertions are marked on the bones.
- Magnetic assembly makes repeated removal convenient.
- Includes a display base and educational brochure.
Cons
- Focused hip coverage is less useful for comparing several joint types.
- Removable pieces require careful storage between lessons.
This is the strongest choice for students studying muscle attachments, instructors explaining layered anatomy, and anyone who needs more than a bare-bone articulation model. Buyers concentrating strictly on ligament motion can save space with the Vision Scientific model, but the extra muscular detail here creates a richer teaching experience. Picture a student moving between a labeled atlas and the model, removing one layer at a time until the crowded page finally makes physical sense.
To buy this product, click here.
2. Best Value: Vision Scientific VAJ233 Classic Functional Hip Joint Model
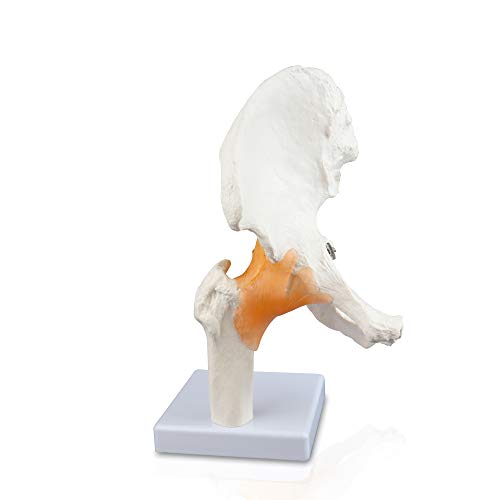
For buyers who care most about mechanics, the Vision Scientific model keeps its attention squarely on the ball-and-socket joint. It presents a complete hip bone, a portion of the femur, and surrounding flexible ligaments at a natural size. That focused construction makes it easy to point out how the femoral head sits in the socket and how ligament structures help frame movement.
The mounted base is useful on a desk, clinic shelf, or demonstration table, where a loose model would otherwise scoot around under a pointing finger. This is a more stripped-back teaching aid than the muscle-heavy overall pick. That simplicity can be refreshing during an introductory lesson, much like clearing a crowded whiteboard before explaining one clean concept.
Pros
- Natural-size presentation supports clear demonstration.
- Flexible ligaments help illustrate possible joint movement.
- Focused design keeps attention on hip mechanics.
- Includes the complete hip bone and part of the femur.
- Mounted base provides a stable display position.
Cons
- Does not provide the removable muscle layers of the top pick.
- Regional relationships with the spine and pelvic floor are limited.
This model suits introductory anatomy courses, basic biomechanics discussions, and patient education where a clean visual explanation matters more than dense detail. It is also a sensible choice for a student who wants a dedicated hip model without filling a small desk with a complete pelvis assembly. Those studying origins, insertions, nerves, or deeper pelvic structures should choose a more elaborate model.
To buy this product, click here.
3. Best for Regional Anatomy: JNMFTD Female Pelvis and Lumbar Spine Anatomy Model

The hip rarely behaves like an isolated hinge in anatomy lessons. The JNMFTD model widens the frame to include the female pelvis, femur, lumbar spine, nerves, and muscles, so learners can follow the region beyond the edge of the acetabulum. Movable, removable femoral heads further support demonstrations of how the proximal femur relates to the pelvic socket.
Different structures are marked with contrasting colors, and a product manual is included for teaching and display. The PVC model can be removed from its sturdy base, a useful feature when an instructor needs to turn the pelvis toward a small group. During a lumbar-pelvic lesson, that broader view can bridge the awkward gap between separate spine and hip diagrams.
Pros
- Combines hip, pelvis, lumbar spine, nerves, and muscles.
- Uses a 1:1 life-size format.
- Movable and removable femoral heads support demonstrations.
- Color differentiation helps separate nearby structures.
- Includes a manual and removable sturdy base.
Cons
- Broader anatomy may feel visually busy during basic hip lessons.
- Larger regional coverage is less portable than a compact joint model.
Medical and allied-health students who need anatomical context will gain more from this model than from a simple femur-and-socket display. It also makes sense for an office where explanations regularly connect the lower spine, pelvis, and hips. For quick demonstrations of ligament movement, however, the cleaner Vision Scientific design is easier to read at a glance.
To buy this product, click here.
4. Best for Pelvic Floor Education: Female Pelvic Muscle and Perineum Model, Life-Size

This life-size model shifts the spotlight from the articular surface of the hip to the muscular bowl inside the pelvis. It displays pelvic floor muscles, ligaments, nerves, and the perineum, alongside the hip bones, sacrum, movable coccyx, and two lumbar vertebrae. Reproductive-organ and rectal inserts expand its usefulness for pelvic anatomy education.
At roughly 27 by 20 by 8 centimeters, it remains suitable for a teaching table or office shelf without shrinking the anatomy to miniature scale. Hand-applied color distinctions help neighboring structures stand apart, and the included manual can guide a lesson. For a learner trying to understand why a pelvic floor diagram looks layered and crowded, this three-dimensional view supplies welcome depth.
Pros
- Life-size display emphasizes pelvic floor relationships.
- Shows muscles, ligaments, nerves, and perineal anatomy.
- Includes hip bones, sacrum, lumbar vertebrae, and movable coccyx.
- Color-coded structures support visual separation.
- Includes anatomical inserts and a teaching manual.
Cons
- Less focused on hip-joint articulation than dedicated hip models.
- Dense pelvic detail may exceed the needs of introductory learners.
This option is best suited to pelvic-health education, nursing instruction, anatomy courses, and clear patient-facing demonstrations of the female pelvic floor. An artist studying the outer mechanics of the hip or a student focused on capsular ligaments will find a dedicated functional joint more direct. Its strength lies in showing what surrounds and supports the pelvic region rather than isolating the ball and socket.
To buy this product, click here.
5. Best for Whole-Body Joint Comparison: Six-Piece Human Joint Anatomy Model Set With Ligaments

A hip model becomes more revealing when it sits beside the shoulder, knee, elbow, hand, and foot. This six-piece set supplies life-size versions of all six, with connected ligaments and articulated movement for studying bending, flexion, and rotation. The hip is one member of the collection rather than the lone star, which suits biomechanics courses with a wider syllabus.
The models use lightweight PVC intended for repeated classroom, laboratory, or office handling. Imagine a practical lesson where students move from the shoulder’s wide mobility to the knee’s constrained motion and then return to the deep hip socket. That direct comparison can turn a list of joint categories into something tactile and memorable.
Pros
- Includes six major joint models in one set.
- Life-size construction preserves visible anatomical relationships.
- Connected ligaments support movement demonstrations.
- Articulated models allow comparison of several motion patterns.
- Suitable for broad anatomy and biomechanics instruction.
Cons
- The hip receives less specialized detail than a dedicated muscle model.
- Six life-size pieces require more storage and display room.
Classrooms, physiotherapy programs, and learners covering the full musculoskeletal system are the natural audience. The set carries more teaching range than any single-joint pick here, yet that breadth comes with a trade-off. Someone preparing specifically for a detailed hip muscle assessment will get more targeted information from the six-part removable-muscle model.
To buy this product, click here.
6. Best Premium Compact Set: GPI Anatomicals Mini-Muscled Four-Joint Model Set

The GPI set packs the hip, knee, elbow, and shoulder onto one compact display while retaining depictions of muscles, nerves, ligaments, and tendons. Each joint is detachable, so an instructor can lift the hip from the shared base and bring it closer during a small-group conversation. The hip component measures approximately 2.5 by 2.75 by 5 inches.
An information card accompanies the set, and the common base measures about 10.6 by 6.25 inches. That tidy footprint works well in a clinic where counter space is precious and a full-size collection would swallow the room. Four small models lined up together also create an inviting visual prompt for discussing why familiar joints move so differently.
Pros
- Shows four major joints with muscular and connective-tissue detail.
- Individual joint models detach from the display.
- Compact shared base conserves shelf and desk space.
- Includes an information card for quick reference.
- Well suited to close-range patient or small-group education.
Cons
- Miniature anatomy is harder to see from the back of a classroom.
- Offers less room for inspecting tiny landmarks than life-size models.
This set fits clinics, compact teaching stations, and educators who want muscular context across multiple joints without juggling six larger models. Its small scale is the defining compromise. Up close, the compact arrangement is neat and approachable. Across a lecture hall, the subtle structures will be much harder to distinguish, so room-wide teaching calls for a larger option.
To buy this product, click here.
7. Best Portable Set: EVOTECH SCIENTIFIC Mini Shoulder, Knee, Hip, and Elbow Joint Set

Half-scale models strike a pleasant middle ground between palm-size miniatures and hefty life-size teaching pieces. This EVOTECH SCIENTIFIC set includes the shoulder, hip, elbow, and knee, with movement intended to demonstrate directions such as forward, backward, inward, and outward rotation. Each piece has its own base, which keeps a tabletop lesson orderly.
The hip model measures about 4.3 by 4.3 by 6.75 inches, compact enough to move between classrooms or carry to a small presentation. Easy-clean PVC adds everyday practicality after repeated handling. A tutor working around a crowded library table could pass the hip around, place it beside the shoulder, and illustrate the difference without hauling a bulky full-size collection.
Pros
- Half-scale format balances visibility and portability.
- Includes four commonly studied major joints.
- Supports demonstrations of several movement directions.
- Separate bases keep each model stable on a table.
- PVC construction is easy to wipe clean.
Cons
- Reduced scale limits the visibility of small landmarks.
- Provides less muscular detail than the overall and GPI picks.
Traveling educators, tutors, and students with limited storage should give this set a close look. It delivers broader comparative value than a single hip model while remaining manageable in a backpack or cabinet. Buyers studying precise muscle attachments or nerve pathways will need a more detailed regional model, since portability is the main attraction here.
To buy this product, click here.
8. Best for Ligament Visualization: Merinden Mini Human Shoulder, Elbow, Hip, and Knee Joint Set

Ligaments can visually melt into pale bone on a poorly differentiated model. Merinden addresses that problem with prominent, color-contrasted ligament and capsule details across the shoulder, elbow, hip, and knee. The four models use a 1:2 scale, giving learners a comparative view of major synovial joints without commandeering an entire demonstration bench.
Each lightweight model sits on a low-profile base, which is handy during rehabilitation instruction or a patient conversation where stability matters. The emphasis on visible stabilizing structures makes the hip especially useful for explaining the relationship between joint shape, capsule, and ligament support. Set beside the knee, the differences become much easier to spot.
Pros
- Color contrast makes ligaments and capsules easier to identify.
- Includes hip, shoulder, elbow, and knee models.
- Half-scale sizing suits tabletop instruction.
- Individual low-profile bases provide stable display.
- Supports comparative lessons on synovial joint mechanics.
Cons
- Half-scale structures are less visible during large-room teaching.
- Muscle anatomy is less comprehensive than on muscled models.
This set makes sense for physical therapy education, sports medicine instruction, and introductory lessons centered on stabilizing structures. It is a particularly appealing alternative to the EVOTECH set for buyers who place greater weight on visible ligament contrast. Learners focused on muscular origins and insertions should still favor the top-ranked removable-muscle model.
To buy this product, click here.
9. Best Basic Movement Display: Life-Size Joint Simulation Anatomy Model

This listing requires more caution than the other picks. Its title identifies it as a knee joint simulation model, while the supplied description refers to abduction, anteversion, retroversion, and internal and external rotation, language more closely associated with hip demonstrations. The verified listing details include natural-size PVC construction, flexible artificial ligaments, and base support.
Its listed dimensions are 17 by 14.5 by 29.5 centimeters, with a stated weight of 2 kilograms. Those specifications suggest a substantial tabletop model rather than a pocket-size teaching aid. The conflicting title and feature description make it less suitable for buyers who need an unambiguous, highly detailed hip reference, but the flexible construction may still appeal to shoppers seeking a basic joint-motion display.
Pros
- Natural-size format offers clear tabletop visibility.
- Flexible artificial ligaments support movement demonstrations.
- Base support helps keep the model positioned during lessons.
- PVC construction is practical for routine educational handling.
- Listed movement directions cover several anatomical planes.
Cons
- The listing title and supplied movement description are inconsistent.
- Provides fewer verified anatomical details than the higher-ranked models.
This model ranks ninth because exact product clarity matters in educational purchasing. Buyers should inspect the current Amazon images and description carefully to confirm that the displayed joint matches their intended lesson before ordering. A dedicated hip listing such as the Vision Scientific model is the safer choice for focused hip education, while this option is better treated as a basic motion-demonstration candidate.
To view the current listing, click here.
How to Choose a Hip Anatomy Model
Start With the Intended Lesson
Picture two desks. On one, a first-year student is tracing the femoral head into the acetabulum. On the other, an instructor is explaining pelvic floor layers to a small nursing class. Both need hip-region anatomy, but the same model will frustrate one of them. A focused joint model is clearer for articulation and ligament mechanics, while a pelvis-and-spine model supplies the regional context needed for nerves, muscles, and nearby skeletal structures.
Write down the structures that must be visible before comparing models. For basic joint mechanics, prioritize the femur, hip bone, capsule, and ligaments. Muscle attachment study calls for removable layers or marked origins and insertions. Pelvic-health teaching benefits from pelvic floor structures, sacrum, coccyx, nerves, and appropriate internal anatomy.
Scale and Viewing Distance
Life-size models make small landmarks easier to locate and generally work better when several people gather around a table. They also occupy more storage space, a fact that becomes painfully obvious when a crowded study shelf starts shedding books. Half-scale sets travel more easily and let learners compare several joints side by side, but subtle markings can become difficult to see from more than a short distance.
Miniatures fit clinics and one-to-one discussions particularly well. A patient sitting across a desk can see a five-inch hip model clearly, while students at the back of a classroom cannot. Match scale to the typical viewing distance rather than assuming bigger or smaller is automatically preferable.
Articulation, Ligaments, and Range of Motion
A movable model helps explain the hip as a ball-and-socket joint, yet movement alone does not guarantee anatomical depth. Flexible ligaments can demonstrate how stabilizing structures surround the joint, while a bare articulation may offer a broader range that is visually clear but less representative of surrounding tissue. Look for listing language that specifically confirms ligaments, capsules, or articulated movement.
Models remain simplified educational tools. Forcing a component beyond its intended movement can stretch flexible parts or loosen connections, so demonstrations should stay controlled. During a classroom exercise, slow rotation and careful positioning usually communicate more than cranking the joint through an exaggerated arc.
Removable Components and Muscle Markings
Removable muscles create a layered learning sequence. A student can identify the superficial structure, remove it, locate the deeper attachment, and then rebuild the arrangement. Magnetic fittings are especially convenient for repeated lessons because there is less fiddling with tiny pegs or fasteners.
Loose components introduce a storage chore, however. A labeled container or dedicated shelf prevents a small muscle piece from vanishing beneath a pile of notes. Buyers who prefer a grab-and-teach model may be happier with fixed ligaments and a mounted base.
Color Coding and Reference Materials
Color contrast helps distinguish adjacent muscles, nerves, ligaments, and bony markings. Strong color separation is particularly useful in the pelvis, where several structures occupy a compact area. Yet color choices differ among manufacturers and may not mirror a particular textbook, so students should learn the structure itself rather than memorizing paint alone.
An included card, brochure, or manual adds value for independent study. It gives the learner a quick checkpoint when a painted landmark is unfamiliar. For formal coursework, the model should complement the terminology and diagrams assigned by the instructor rather than replace them.
Base Design, Portability, and Care
A stable base keeps the model from wobbling while someone points to the acetabulum or rotates the femur. Detachable models offer more freedom for close inspection, while fixed mounts are harder to misplace. Multi-joint sets with separate bases consume more tabletop area but allow an instructor to arrange joints in any sequence.
Most products in this roundup specify PVC or similar molded construction. A soft cloth and gentle cleaning approach are sensible for routine care, following the manufacturer’s directions where provided. Store removable parts away from heat, crushing weight, and the chaotic bottom of a backpack, where delicate details can take a beating.
Best Hip Anatomy Models FAQ
Is a Life-Size Hip Model Better Than a Miniature One?
Life-size models are generally easier for locating small landmarks and teaching groups. Miniature models are more portable and fit comfortably on a desk, making them practical for individual study or close-range conversations. The better choice depends on viewing distance, storage space, and the required anatomical detail.
What Structures Should a Good Hip Model Show?
At minimum, a focused skeletal model should clearly show the proximal femur, femoral head, acetabulum, and hip bone. Models intended for biomechanics may add flexible ligaments or a capsule. More detailed study can call for muscles, marked origins and insertions, nerves, lumbar vertebrae, or pelvic floor structures.
Are Removable Muscles Worth Having?
They are particularly useful for studying layers and attachment relationships. Removing a muscle can expose structures hidden beneath it and make origins and insertions easier to connect spatially. For a simple explanation of ball-and-socket motion, removable muscles add complexity that may be unnecessary.
Can a Hip Anatomy Model Be Used for Patient Education?
Yes, a clear model can support a visual explanation during a professional conversation. Focused models are often easiest to understand because the key structures are immediately visible. They are educational aids and do not provide a diagnosis or replace guidance from a qualified healthcare professional.
Should Students Buy a Hip-Only Model or a Multi-Joint Set?
A hip-only model offers more concentrated study and often includes richer local detail. A multi-joint set is more useful for comparing movement, ligament arrangement, and joint shape across the body. Students should check the course syllabus and choose the format that matches upcoming practical work.
Do Color-Coded Anatomy Models Use Universal Colors?
No universal paint scheme applies across every manufacturer. Color coding helps separate adjacent structures, but a nerve, muscle, or attachment marking may use a different shade from the one in a course atlas. Confirm identities through labels, manuals, and anatomical position rather than color by itself.
How Should Removable Anatomy Model Parts Be Stored?
Keep pieces together in a labeled container or fitted storage area, away from direct heat and heavy objects. Reassemble components gently and avoid forcing magnetic or pegged connections. A quick parts check after each lesson can save a frantic search before the next class.
Final Verdict
The Hip Joint Model With Removable Muscles is the strongest overall recommendation among these nine products. Its life-size construction, six-part design, magnetic assembly, and marked muscle origins and insertions address the features that matter most for focused hip study. It can move from a quiet exam-prep session to a teaching demonstration without feeling either bare or needlessly sprawling.
For a simpler look at ball-and-socket mechanics, the Vision Scientific Functional Hip Joint Model is the more direct value pick. Buyers who need the hip connected to the pelvis, lumbar spine, nerves, and muscles should move toward the JNMFTD Female Pelvis and Lumbar Spine Model. Match the model to the lesson first, then check scale, removable parts, articulation, and base design. That simple order keeps a glossy display piece from becoming an expensive shelf ornament and leads to a model that earns its place beside the atlas.
