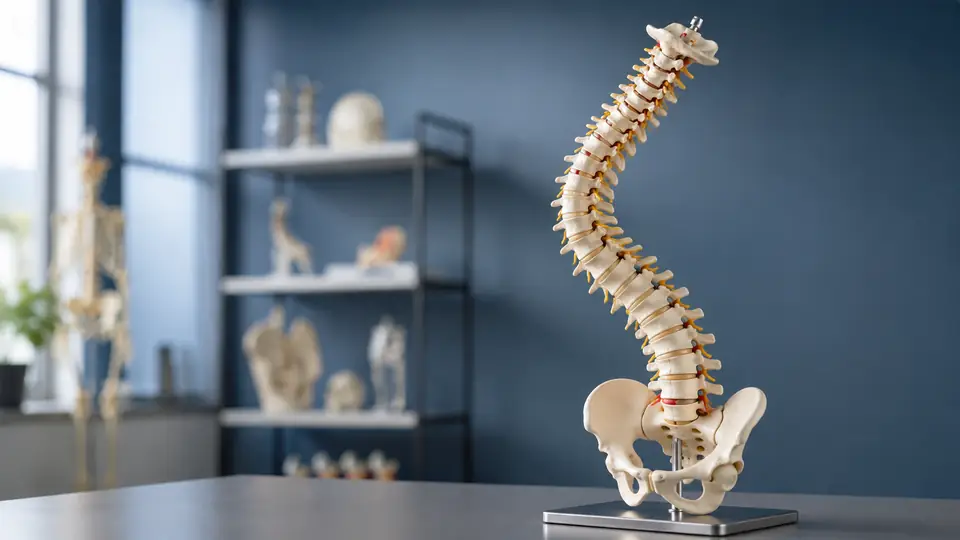
A rigid spine diagram shows where the bones sit. A flexible spine model shows something a flat image cannot: how those parts relate when the vertebral column bends, rotates, and changes shape. When the model leans forward, the cervical, thoracic, and lumbar regions form a visible curve. When it returns upright, the joints and connective elements reveal why the spine is both supportive and mobile.
That movement is the main purpose of a flexible spine model. It is an educational representation of the vertebral column, usually built with movable joints, elastic elements, springs, or flexible connecting material. The exact construction varies, so one model may emphasize spinal motion while another may focus on removable parts, nerve pathways, or the relationship between the spine and pelvis.
In practical terms, what does a flexible spine model show? It shows the arrangement of the vertebrae, the broad regions of the spine, the natural spinal curves, and the way neighboring structures move in relation to one another. It does not reproduce every feature of a living spine or diagnose a spinal condition, but it gives learners a three-dimensional way to examine anatomy that is difficult to understand from a page alone.
What Makes a Spine Model Flexible?
A flexible spine model is designed so that at least part of the spinal column can move. The vertebrae are commonly connected by a cord, wire, spring, elastomeric material, or another joint system. This permits bending and sometimes limited rotation, although the available range depends on the model’s construction.
The flexibility is not meant to imitate the exact motion of a human spine. Instead, it demonstrates relationships. A student holding the upper end of the model can see how the vertebral column changes from its upright alignment into a forward curve. In a classroom, an instructor might gently bend the model while explaining flexion, extension, or lateral bending. At a desk, a learner can compare that movement with a rigid spine model and immediately notice what the rigid version leaves out.
Some models are flexible throughout the column, while others have more controlled movement in selected sections. A model may also include a stand, skull, pelvis, spinal nerves, arteries, or removable vertebrae. Those additions are not universal, so the product’s labeling and documentation matter when identifying exactly what it displays.
The Main Anatomy Visible on a Flexible Spine Model
Vertebral Regions and Individual Bones
Most flexible spine models divide the vertebral column into five familiar regions: cervical, thoracic, lumbar, sacral, and coccygeal. The cervical region is located in the neck, the thoracic region corresponds to the upper and middle back, and the lumbar region occupies the lower back. Below them, the sacrum and coccyx form the lower end of the spinal column.
That regional arrangement becomes easier to follow when the model is held upright and viewed from the side. The smaller cervical vertebrae sit above the larger lumbar vertebrae, creating a visual change in size and shape. A learner studying the lower back might trace the model with a fingertip from the neck downward and notice the gradual thickening of the vertebral bodies, while someone studying the thoracic region can relate it to the rib-bearing portion of the spine.
Many models show the vertebrae as separate pieces connected in sequence. Others mold several structures together or use simplified shapes. The model may identify typical vertebrae, but it may not show every subtle landmark, such as the complete variation between individual vertebrae. It is best treated as a three-dimensional overview rather than a substitute for a detailed atlas.
Spinal Curves
Viewed from the side, the human spine is not a straight vertical rod. It has cervical and lumbar lordotic curves, along with thoracic and sacral kyphotic curves. A flexible model makes this alternating pattern especially clear because the column can be seen as a continuous structure rather than a stack of isolated bones.
When a student tilts the model forward, the curves change visibly. When the model is returned to its neutral position, the familiar side profile reappears. This can help distinguish a normal anatomical curve from a simple drawing convention. The model demonstrates the overall contour, though it should not be used to judge an individual person’s posture or diagnose an abnormal curvature.
Intervertebral Discs and Spacing
Some flexible spine models include intervertebral discs as colored pads or spaces between the vertebrae. These structures help learners see that the vertebral bodies do not form a solid bone column from top to bottom. The disc spaces also explain why the model needs connecting material and room for movement between adjacent vertebrae.
Look closely at how the discs are represented. A teaching model may show them as simplified rings, flat cushions, or narrow colored bands. Such designs communicate location and general function, but they do not reproduce the detailed layers of a real disc. If a learner is studying disc anatomy in depth, the spine model works best alongside a close-up diagram or a dedicated disc illustration.
Spinal Canal and Nerve Pathways
Many vertebrae are shaped with openings that align to form the vertebral canal. On a model that leaves these spaces visible, the learner can trace the protected passageway through the center of the column. Some flexible spine models also show spinal nerves emerging between vertebrae, often as thin colored branches.
This is one of the most useful three-dimensional features. A diagram may show a nerve emerging from a side view, but the model lets a student rotate the spine and inspect the opening from another direction. In a study session, that simple change in angle can clarify the difference between the central canal and the smaller openings between adjacent vertebrae. The nerve representation is usually schematic, so it should not be interpreted as a complete map of every nerve branch.
What Movement Does the Model Demonstrate?
Depending on its design, a flexible spine model may demonstrate several broad movements:
- Flexion: bending the spine forward.
- Extension: moving the spine backward toward a more extended position.
- Lateral flexion: bending toward the left or right side.
- Rotation: turning around the long axis of the spine, when the model allows this movement.
These movements are shown at the level of relationships between sections, not as a precise measurement of human range of motion. A classroom model may bend farther than a real spine would safely move, or it may resist movement more strongly because its joints are designed to hold their shape. That difference matters. The model illustrates direction and structure, not a clinical test.
For example, a learner can gently curve the lumbar region and observe how the lower vertebrae remain connected while the overall alignment changes. Another learner can rotate the model slightly and identify which portions move together. These demonstrations are useful because they turn words such as “flexion” and “rotation” into visible spatial events, without suggesting that the model represents a patient’s movement.
Flexible Versus Rigid Spine Models
| Feature | Flexible Spine Model | Rigid Spine Model |
|---|---|---|
| Movement | Allows bending and sometimes limited rotation | Maintains a fixed alignment |
| Main teaching emphasis | Motion, curvature, and relationships between regions | Shape, landmarks, and overall arrangement |
| Handling | May need support or careful positioning | Usually stays in a stable pose |
| Study advantage | Connects anatomy with movement | Provides a consistent reference for identification |
The difference is not simply that one type is better. A rigid model can be easier to label or inspect because the vertebrae remain fixed. A flexible model adds motion, but its moving parts may make it harder to point to one exact landmark while the column is bent. A student identifying the spinous processes, for instance, may prefer a stable position first and then use flexibility to explore how the landmarks relate during movement.
Using both styles can create a useful sequence. Begin with the fixed arrangement, identify the regions and major landmarks, then bend the flexible model to examine how those regions behave together. The rigid model supplies a steady map, while the flexible model adds the shifting perspective that a static image cannot provide.
What a Flexible Spine Model Does Not Show
A flexible spine model is a simplified teaching aid. It usually does not show the complete thickness, texture, and microscopic organization of bone, cartilage, ligaments, muscles, blood vessels, and nerves. Even when those structures appear on the model, they are often enlarged, color-coded, or reduced to make the anatomy visible.
The model also does not reproduce the full complexity of living movement. Real spinal motion depends on many tissues and on the coordinated action of surrounding muscles. A plastic vertebral column with an elastic connector cannot reproduce those forces. If the model bends smoothly in one direction, that does not mean a human spine moves identically or safely through the same angle.
Pathology is another frequent source of confusion. A flexible model may show spinal curvature or a damaged disc as an educational example, but an ordinary flexible spine model generally represents basic anatomy, not a diagnosis. A model can help explain terms used in medical education, while examination of an actual person requires qualified clinical assessment and appropriate imaging when indicated.
How Students and Teachers Use the Model
The most effective use begins with identification. Hold the model in its neutral position and name the five regions from top to bottom. Then locate the vertebral bodies, posterior elements, disc spaces, and any visible canal or nerve structures. Saying the terms aloud while touching each feature creates a simple active-recall exercise instead of passive viewing.
Next, change one feature at a time. Bend the model forward and describe what happened to the overall curve. Return it to neutral, then tilt it sideways and identify the direction of movement. A student studying for an anatomy practical might have a partner point to a region without naming it, while the student identifies the region and explains its position. A teacher might perform the same exercise from the front, side, and posterior views so learners practice spatial orientation rather than memorizing one silhouette.
Pairing the model with a labeled diagram or digital resource is often helpful. The physical model shows depth and movement, while the image can provide a closer view of small landmarks. Neither tool needs to do everything. The important step is to check that the labels on the model match the terminology used in the course or reference material, since manufacturers may simplify or name some features differently.
Handling and Storage Considerations
Flexible joints and connecting elements deserve more care than a solid display model. Move the spine slowly and within the range that the construction allows. Forcing a bend, twisting the column sharply, or pulling on a removable pelvis or skull can stress cords, joints, magnets, and adhesive connections.
Keep the model supported when it is not being handled. A stand, if supplied, may be designed to hold the column in a particular position, and storing the model under pressure could gradually distort flexible components. Cleaning instructions vary with the plastic, paint, printed labels, and other materials, so manufacturer guidance should take priority. In the absence of specific instructions, a soft, lightly damp cloth is generally less risky than abrasive tools or strong solvents, but compatibility should not be assumed.
Frequently Asked Questions
Does a flexible spine model show real human spinal movement?
It shows the general directions and relationships of spinal movement, such as bending forward, extending, or leaning sideways. It does not reproduce the exact range, forces, or coordinated muscle action of a living spine.
Can the model show all the vertebrae?
Many full spine models represent the cervical, thoracic, lumbar, sacral, and coccygeal regions. The amount of detail varies, and some models simplify or combine structures. Check the model’s labeling and specifications for the exact number of visible or removable parts.
Does flexibility mean the model is anatomically more accurate?
Not necessarily. Flexibility adds an important demonstration feature, but accuracy also depends on the shapes, proportions, labels, and structures included. A rigid model may show certain bony landmarks more clearly.
Can a flexible spine model be used to diagnose a spinal problem?
No. It is an educational representation and cannot assess an individual’s anatomy, symptoms, posture, or condition.
The Practical Meaning of a Flexible Spine Model
A flexible spine model shows more than a column of bones. It connects the regions of the vertebral column with their changing alignment, curvature, and movement. Its greatest value is the chance to examine anatomy from multiple angles while gently changing the spine’s position.
Use it first to identify the major regions and structures, then use its movement to explore flexion, extension, lateral bending, and any rotation the design permits. Keep its limitations in view, especially when the model simplifies discs, nerves, or spinal curves. Used alongside diagrams, atlases, or digital tools, it becomes a clear bridge between memorized labels and three-dimensional anatomical understanding.
